Instagram bot follower automatico "Inshackle v1.0"

Instagram BOT

Piccolo ma potente software // Inshackle

Ti permette di monitorare gli utenti che non ti seguono inoltre permette di aumentare i tuoi follower, scarica storie e molto altro ancora.

Installazione: 

git clone https://github.com/cyberkallan/inshackle-bot
cd inshackle-bot
bash inshackle.sh

Fonte originale: cyberkallan  Grazie per il tuo contributo! 


======================================================================================== Dichiarazione di non responsabilità: l'utilizzo di Inshackle v1.0 e in piena responsabilità dell'utente finale osservare tutte le leggi locali, statali e federali applicabili. Gli autori non si assumono alcuna responsabilità e non sono responsabili per qualsiasi uso improprio o danno causato da questo programma. ========================================================================================

Codelobster free Code-Editor

smart free cross-platform IDE (editor)

Free PHP, HTML, CSS, JavaScript editor - Codelobster IDE

Released: March 26, 2020

In this article, we suggest you to get acquainted with the free editor of web languages - Codelobster IDE. It is presented on the software market for a long time already, and it wins a lot of fans.

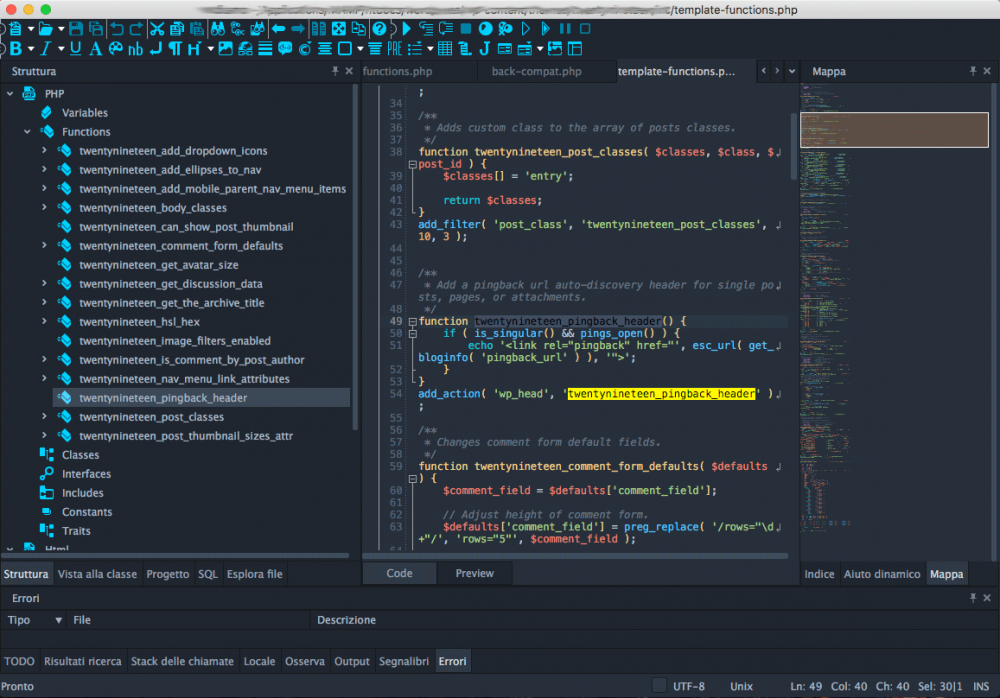
Codelobster IDE allows you to edit PHP, HTML, CSS and JavaScript files, it highlights the syntax and gives hints for tags, functions and their parameters. This editor easily deals with those files that contain a mixed content.

If you insert PHP code in your HTML template, then the editor correctly highlights both HTML tags and PHP functions. The same applies to CSS and JavaScript code, which is contained in HTML files.

The program includes auto-completion function, which greatly speeds up the programmer's work and eliminates the possibility of errors.

Codelobster IDE provides contextual help on all supported programming languages, it uses the most up to date documentation at this moment, downloading it from official sites. So we can quickly get a description of any HTML tag, CSS attribute, PHP or JavaScript function by pressing the F1 key.

The built-in PHP debugger allows you to execute PHP scripts step by step, sequentially moving through the lines of code. You can assign check points, view the process of the work of loops, and monitor the values of all variables during the execution of the script.

You can view the HTML templates directly in the editor, highlight the interesting elements on the page and explore the associated CSS styles. HTML and CSS inspector works by the principle of all known FireBug

Other useful functions and features of the IDE:

  • A pair highlighting of parentheses and tags - you will never have to count parentheses or quotation marks, the editor will take care of it.
  • Highlighting of blocks, selection and collapsing of code snippets, bookmarks to facilitate navigation on the edited file, recognition and building of the complete structure of PHP projects - these functions ensure easy work with projects of any scale.
  • Support for 17 user interface languages, among them English, German, Russian, Spanish, French and others.
  • The program works on the following operation systems: Windows 7, Windows 8, Windows 10, Mac OS, Linux, Ubuntu, Fedora, Debian.


The professional version of Codelobster IDE provides the programmer with even more features.

For example, you have an opportunity to work with projects on a remote server with use of the built-in FTP client. You can edit the selected files, preview the results and then synchronize the changes with the files on the hosting.


In addition the professional version includes an extensive set of plug-ins:

  • Fully implemented support for JavaScript libraries, such as jQuery, Node.js, AngularJS, BackboneJS and MeteorJS.
  • A large set of extensions that help to work with PHP frameworks - CakePHP, CodeIgniter, Laravel, Phalcon, Smarty, Symfony, Twig and Yii plug-ins.
  • Plugins for working with the most popular CMS - Drupal, Joomla, Magento and WordPress.

We can download and install any framework directly from the program without being distracted from the main tasks.

In general, for a year of work, our team had no complaints against the editor. Codelobster IDE works fast, does not hang and allows us to work even with large PHP projects.

You can download Codelobster IDE from the official website codelobsteride.com


RED_HAWK Vulnerability Scanning And Crawling Tool For Hackers

RED_HAWK Vulnerability Scanning

Vulnerability Scanning "RED_HAWK"

 RED_HAWK: é uno sofware scritto in PHP molto ben fatto; la sua caratteristica e di unire due potenti strumenti in uno
1 Raccolte informazioni 
2 Scansionare possibili vulnerabilità


Testato su Sierra ovvimante sotto Homebrew gestore di pacchetti mancanti per macOS. (Finalmente tradotto anche in Italiano)
Ovvimante è importante installare tutti pacchetti per la gestione PHP del sofware.

Prima della Installazione consiglio sempre di aggiornare Homebrow:

brew update

Installare:

git clone https://github.com/Tuhinshubhra/RED_HAWK redhawk
cd redhawk
php rhawk.php
fix

IMPOPRTANTE
Il comando fix installerà tutti i moduli richiesti.
dopo di che basterà richimare il semplice  php rhawk.php

=================================================================================

Elenco di CMS supportati su RED_HAWK:
è attualmente in grado di rilevare i seguenti CMS (Content Management Systems):
WordPress
Joomla
Drupal
Magento

Tool For Hackers

=================================================================================

Scansioni che sono possibili utilizzando RED HAWK:
Per dettagli consultare la pagina dello sviluppatore:https://github.com/Tuhinshubhra/RED_HAWK

  • Scansione di base
    • Titolo del sito NUOVO
    • Indirizzo IP
    • Rilevamento server Web IMPROVED
    • Rilevazione CMS
    • Rilevamento Cloudflare
    • Scanner di robots.txt
  • Whois Lookup IMPROVED
  • Ricerca geo-IP
  • Afferra i banner IMPROVED
  • Ricerca DNS
  • Calcolatore di sottorete
  • Scansione porta Nmap
  • Scanner di sottodomini IMPROVED
    • Sottodominio
    • Indirizzo IP
  • Ricerca IP inversa e rilevamento CMS IMPROVED
    • Nome host
    • Indirizzo IP
    • CMS
  • Scanner SQLi basato su errori
  • Blogger Visualizza NUOVO
    • Codice di risposta HTTP
    • Titolo del sito
    • Classifica Alexa
    • Autorità di dominio
    • Autorità della pagina
    • Estrattore di link sociali
    • Link Grabber
  • WordPress Scan NOVITÀ
    • Scansione di file sensibili
    • Rilevamento versione
    • Scanner vulnerabilità versione
  • crawler
  • Ricerca MX NOVITÀ
  • Scan for Everything: il vecchio scanner zoppo


======================================================================================== Dichiarazione di non responsabilità: l'utilizzo di RED_HAWK per testare o sfruttare siti Web senza una precedente coerenza reciproca può essere considerato un'attività illegale. È responsabilità dell'utente finale osservare tutte le leggi locali, statali e federali applicabili. Gli autori non si assumono alcuna responsabilità e non sono responsabili per qualsiasi uso improprio o danno causato da questo programma. ========================================================================================

WAScan - Web Application Scanner

WAScan

Potente scanner di sicurezza (Cybersecurity) Open Source

Progettato per trovare vulnerabilità utilizzando il metodo "black-box", il che significa che non studierà il codice sorgente delle applicazioni Web ma come un fuzzer, scansionando le pagine dell'applicazione Web distribuita, estraendo collegamenti e moduli e attaccando gli script, l'invio di payload e la ricerca di messaggi di errore, ecc. (Link sorgente)
WAScan è basato su python2.7 e può essere eseguito su qualsiasi piattaforma che disponga di un ambiente Python.
Ottimo sofware molto potente e versatile alla nostre esigenze da testare!

Testato su Sierra ovvimante sotto Homebrew gestore di pacchetti mancanti per macOS. (Finalmente tradotto anche in Italiano)

INSTALLAZIONE:

$ git clone https://github.com/m4ll0k/WAScan.git wascan
$ cd wascan 
$ pip install BeautifulSoup
$ python wascan.py

=====================
=============== Features:

Fingerprint:

Content Management System (CMS) -> 6
Web Frameworks -> 22
Cookies/Headers Security
Languages -> 9
Operating Systems (OS) -> 7
Server -> ALL
Web App Firewall (WAF) -> 50+

$ python wascan.py --url http://xxxxx.com/ --scan 0


Attacks:

Bash Commands Injection
Blind SQL Injection
Buffer Overflow
Carriage Return Line Feed
SQL Injection in Headers
XSS in Headers
HTML Injection
LDAP Injection
Local File Inclusion
OS Commanding
PHP Code Injection
SQL Injection
Server Side Injection
XPath Injection
Cross Site Scripting
XML External Entity

$ python wascan.py --url http://xxxxx.com/index.php?id=1 --scan 1


Audit:

Apache Status Page
Open Redirect
PHPInfo
Robots.txt
XST

$ python wascan.py --url http://xxxxx.com/ --scan 2


Bruteforce:

Admin Panel
Common Backdoor
Common Backup Dir
Common Backup File
Common Dir
Common File
Hidden Parameters

$ python wascan.py --url http://xxxxx.com/ --scan 3


Disclosure:

Credit Cards
Emails
Private IP
Errors -> (fatal errors,...)
SSN


$ python wascan.py --url http://xxxxx.com/ --scan 4

Full Scan:

$ python wascan.py --url http://xxxxx.com --scan 5 

Bruteforce Hidden Parameters:

$ python wascan.py --url http://xxxxx.com/test.php --brute

Advanced Usage:

$ python wascan.py --url http://xxxxx.com/test.php --scan 5 --auth "admin:1234"
$ python wascan.py --url http://xxxxx.com/test.php --scan 5 --data "id=1" --method POST
$ python wascan.py --url http://xxxxx.com/test.php --scan 5 --auth "admin:1234" --proxy xxx.xxx.xxx.xxx 
$ python wascan.py --url http://xxxxx.com/test.php --scan 5 --auth "admin:1234" --proxy xxx.xxx.xxx.xxx --proxy-auth "root:4321"
$ python wascan.py --url http://xxxxx.com/test.php --scan 5 --auth "admin:1234" --proxy xxx.xxx.xxx.xxx --proxy-auth "root:4321 --ragent -v


========================================================================================
Dichiarazione di non responsabilità: l'utilizzo di WAScan per testare o sfruttare siti Web senza una precedente coerenza reciproca può essere considerato un'attività illegale. È responsabilità dell'utente finale osservare tutte le leggi locali, statali e federali applicabili. Gli autori non si assumono alcuna responsabilità e non sono responsabili per qualsiasi uso improprio o danno causato da questo programma.
========================================================================================

Cross-Site Scripting (XSS)

Cross-Site Scripting (XSS)

Attacco attraverso l’inserimento di codici malevoli

Questo tipo di attacco Cross-Site Scripting (XSS) consiste nell’inserimento di codici malevoli, nella maggior parte dei casi tag HTML, facendo in modo di accedere a dati sensibili e nei casi più gravi rubare i dati di sessioni dell’utente, compromettere browser e sistemi opretivi. Tutto questo sembra ancora non bastare per molti sviluppatori che con semplice superbia pensano di essere invincibili.

Possiamo quindi dire, che il Cross-Site Scripting,  come il  SQL Injection, appartengono alla categoria delle code Injection, con l’unica differenza che se le SQL Injection operavano solo su contenuti dinamici, mentre il Cross-Site Scripting opera su contenuti dinamici e statici.

In sintesi il Cross-Site Scripting (XSS) agisce solamente lato client iniettando codice malevolo dal browser.
Mentre SQL Injection agisce lato server con lo scopo di prenderne possesso.

Questo tipo di attacco costituisce, ad oggi, una delle più importanti minacce per quanto riguarda lo sviluppo Web o il "Cattivo sviluppo Web" purtroppo non tutti ne capiscono ancora il reale pericolo, ci sono però molti articoli in materia è sopratutto grazie al progetto OWASP Secure Headers Project  Potremo capire meglio come previnire questi tipi di attacchi inserendo via .htaccess determinati comandi:

HTTP Strict Transport Security (HSTS)
Public Key Pinning Extension for HTTP (HPKP)
X-Frame-Options
X-XSS-Protection
X-Content-Type-Options
Content-Security-Policy
X-Permitted-Cross-Domain-Policies
Referrer-Policy
Expect-CT
Feature-Policy

Come questo esempio (Ovvimante va approffondito comando per comando):

  Header unset X-Powered-By
  Header set Content-Security-Policy "connect-src 'self';"
  Header always set Referrer-Policy "same-origin"
  Header always set X-Frame-Options "SAMEORIGIN"
  Header always set X-Xss-Protection "1; mode=block"
  Header always set X-Content-Type-Options "nosniff"
  Header always set Feature-Policy "microphone 'none'; payment 'none'; sync-xhr 'self' https://iltuosito.it"
  Header always set Strict-Transport-Security "max-age=63072000; includeSubDomains"
  Header set Public-Key-Pins "pin-sha256=\"base64+primary==\"; pin-sha256=\"base64+backup==\"; max-age=5184000; includeSubDomains"
  Header always set X-Permitted-Cross-Domain-Policies: "master-only"

Tecniche di Cross-Site Scripting:

  • Non Persistent/ Reflected XSS
  • Persistent/Stored XSS
  • DOM-based


Non Persistent/ Reflected XSS

=============================================================

Gli attacchi non persistenti devono il loro nome al fatto che il codice malevolo iniettato non è permanente nel sito web e le vittime sono soltanto quelle persone che accedono alla pagina compromessa, cliccando su un link realizzato ad hoc.
Prima di tutto l’attaccante dovrà vedere se il sito scelto è realmente vulnerabile e per fare ciò, molto spesso, si servirà della finestra di ricerca, che è presente nella maggior parte di siti web ed è anche la vulnerabilità più ricorrente.

Persistent/Stored XSS

=============================================================

Gli attacchi XSS persistenti, anche conosciuti come Stored XSS o HTML Injection, al contrario degli attacchi XSS non persistenti, iniettano il codice malevolo permanentemente e non richiedono nessun link di riferimento.
La maggior parte degli attacchi avvengono nei siti web che contengono forum, blog, wiki, guest book e così via. Non appena l’utente accede a queste aree danneggiate, il codice viene eseguito in maniera automatica. Questo rende gli Stored XSS molto più dannosi rispetto a quelli non persistenti o DOM Based, perché la vittima non ha alcun modo di difendersi.

DOM-based

=============================================================

Il Cross-Site Scripting, chiamata DOM-based o XSS locale, che differisce completamente dalle due precedenti, in quanto non richiede l’invio del malware dal server, ma è trasferito ed eseguito direttamente sul browser del client.
Ma come viene eseguito il JavaScript dell’attaccante?
Tutto inizia quando l’utente richiede l’URL che è stato infettato con il codice JavaScript dell’attaccante. Nella risposta del server ancora non viene eseguito il malware ma questo avviene quando è il browser a processare la richiesta con la conseguente esecuzione dello script.

Il JavaScript del client può accedere al document object model (DOM) e quindi può determinare l’url usato per caricare questa certa pagina. Un determinato script, scritto ad hoc, può estrarre quindi dei dati contenuti nell’URL, eseguire alcune elaborazioni di dati e successivamente utilizzarle per aggiornare dinamicamente il contenuto della pagina.
Quando un applicazione web è soggetta a questi comportamenti, molto probabilmente è soggetta ad attacchi XSS di tipo DOM-based.

X-Permitted Cross Domain Policies

Cross-Site Scripting

Security Header // Cross-Site Scripting

Mai come adesso abbiamo la necessità in Italia di studiare ed essere aggiornati con la Security Header in termini di Cybersecurity.
Come visto nell'articolo precendente - - security-headers -

Spesso moti attacchi appunto avvengono attraverso Cross-Site.
Usando questo comado all'interno del fiel .htaccess:

Header set X-Permitted-Cross-Domain-Policies "none"

se usi prodotti Adobe come PDF, Flash...è possibile implementare questa intestazione per indicare al browser come gestire le richieste su un dominio incrociato.
Implementando questa intestazione, limiti il ​​caricamento delle risorse del tuo sito da un altro dominio per evitare l'abuso di risorse.

Ci sono alcune opzioni disponibili oltre quella indicata sopra (none):
===================================================
Value = Descrizione
none = nessuna politica è consentita
master-only = consentire solo la politica principale
all = tutto è permesso
by-content-only = Consenti solo un determinato tipo di contenuto. Esempio: XML
by-ftp-only = applicabile solo per un server FTP
===================================================

Header set X-Permitted-Cross-Domain-Policies "Value"
Header set X-Permitted-Cross-Domain-Policies "none"
Header set X-Permitted-Cross-Domain-Policies "master-only"
Header set X-Permitted-Cross-Domain-Policies "all"


Nello specifico si deve consultare: OWASP Secure Headers Project

Wordpresscan Wordpress scanner

Wordpresscan

Web vulnerability scanner

Un semplice ma potente Wordpress scanner scritto in python (2.7) basato sul lavoro di WPScan (versione Ruby), ed alcune funzionalità sono ispirate a WPSeku altro noto Scanner, anche per la funzionalità di effettuare attacchi bruteforceLINK UFFICIALE

Testato su macOS Sierra.
Ovvimante sotto Homebrew gestore di pacchetti mancanti per macOS. (Finalmente tradotto anche in Italiano)

Installazione:

git clone https://github.com/swisskyrepo/Wordpresscan.git
cd Wordpresscan

virtualenv .venv -p /usr/bin/python2.7
source .venv/bin/activate
pip install -r requirements.txt

Una volta fatto installate tutte le dipendeze che variano a seconda della tua configurazione iniziale, se tutto è andato a buon fine lanciamo il programma:

cd Wordpresscan
python2.7  wordpresscan.py

 Le istruzioni sono tutte molto simili a i fratellini WPSeku e WPScan:

 - bruteforce customs usernames:

python2.7 wordpresscan.py -u "http://127.0.0.1/wordpress/" --brute --usernames "admin,guest" --passwords-list fuzz/wordlist.lst

- bruteforce con usernames list:

python2.7 wordpresscan.py -u "http://127.0.0.1/wordpress/" --brute --users-list fuzz/wordlist.lst --passwords-list fuzz/wordlist.lst

- bruteforce detected users:

python2.7 wordpresscan.py -u "http://127.0.0.1/wordpress/" --brute --passwords-list fuzz/wordlist.lst

 ========================================================================================
Dichiarazione di non responsabilità: l'utilizzo di Wordpresscan per testare o sfruttare siti Web senza una precedente coerenza reciproca può essere considerato un'attività illegale. È responsabilità dell'utente finale osservare tutte le leggi locali, statali e federali applicabili. Gli autori non si assumono alcuna responsabilità e non sono responsabili per qualsiasi uso improprio o danno causato da questo programma.
========================================================================================

Hacktronian - One Hacking Tool


Hacktronian - Per Linux & Android

Link Download

Tools & Frameworks testato su macOS Sierra!
Ovvimante sotto Homebrew gestore di pacchetti mancanti per macOS. (Finalmente tradotto anche in Italiano)
Testato con successo e provato nonostante nato per sistemi Linux come Kali  a regaito bene alla mia installazione, non tutti pacchetti danno compatibilità su macOS Sierra perché studiati per Linux e Android, ma nel complesso e da provare, scritto in Python 2.

Installazione Linux o macOS (Homebrew)

============================================================================

Questo tool deve funzionare come ROOT (sudo)!

git clone https://github.com/thehackingsage/hacktronian.git
cd hacktronian
chmod +x install.sh
./install.sh

Lancio del Tool:

cd hacktronian
python2 hacktronian.py

Installazione Android (non ancora testo)

============================================================================

Sotto terminale Termux

pkg install git
pkg install python
git clone https://github.com/thehackingsage/hacktronian.git
cd hacktronian
chmod +x hacktronian.py
python2 hacktronian.py

undefined

HACKTRONIAN Menu :

1 Information Gathering
2 Password Attacks
3 Wireless Testing
4 Exploitation Tools 5 Sniffing & Spoofing
6 Web Hacking
7 Private Web Hacking
8 Post Exploitation
9 Install The HACKTRONIAN

=============================================================================

Ma vediamo le potenzialita:

Information Gathering:
Nmap
Setoolkit
Port Scanning
Host To IP
wordpress user
CMS scanner
XSStrike
Dork - Google Dorks Passive Vulnerability Auditor
Scan A server's Users
Crips

Password Attacks:
Cupp
Ncrack

Wireless Testing:
reaver
pixiewps
Fluxion

Exploitation Tools:
ATSCAN
sqlmap
Shellnoob
commix
FTP Auto Bypass
jboss-autopwn

Sniffing & Spoofing:
Setoolkit
SSLtrip
pyPISHER
SMTP Mailer

Web Hacking:
Drupal Hacking
Inurlbr
Wordpress & Joomla Scanner
Gravity Form Scanner
File Upload Checker
Wordpress Exploit Scanner
Wordpress Plugins Scanner
Shell and Directory Finder
Joomla! 1.5 - 3.4.5 remote code execution
Vbulletin 5.X remote code execution
BruteX - Automatically brute force all services running on a target
Arachni - Web Application Security Scanner Framework

Private Web Hacking:
Get all websites
Get joomla websites
Get wordpress websites
Control Panel Finder
Zip Files Finder
Upload File Finder
Get server users
SQli Scanner
Ports Scan (range of ports)
ports Scan (common ports)
Get server Info
Bypass Cloudflare

Post Exploitation:
Shell Checker
POET
Weeman

 ========================================================================================
Dichiarazione di non responsabilità: l'utilizzo di Hacktronian per testare o sfruttare siti Web e Reti Wifi senza una precedente coerenza reciproca può essere considerato un'attività illegale. È responsabilità dell'utente finale osservare tutte le leggi locali, statali e federali applicabili. Gli autori non si assumono alcuna responsabilità e non sono responsabili per qualsiasi uso improprio o danno causato da questo programma.
========================================================================================

WPSeku Security Scanner Wordpress

WPSeku - Wordpress Security Scanner

Web Scanner WP security

WPseku software scritto in Python 3, testato su macOS Sierra. link = github/WPSeku
Ovvimante sotto Homebrew gestore di pacchetti mancanti per macOS. (Finalmente tradotto anche in Italiano)

WPSeku
è un web scanner per valutare e analizzare anche in locale vulnerabilità del noto CMS WordPress, inoltre è possibile anche lanciare degli attacchi brute force associando la tua wordlist.txt.

Installazione tramite terminale:

$ git clone https://github.com/m4ll0k/WPSeku.git wpseku
$ cd wpseku
$ pip3 install -r requirements.txt
$ python3 wpseku.py

Usiamo WPSeku:

Impostaimo il primo comando il più semplice

python3 wpseku.py --url https://www.sitoinquestione.com --verbose

Qundi una volta partito il comando WPSeku farà uno scanner completo e se fattibile ci potrà dare tutte le informazioni necessarie. Una delle più importante sono i famosi Username per poi tentare un brute force - spesso delle volte lasciato in admin (id1) ancora più grave;
dato che si denota una non coltura alla Cyber Security permettendo molti altri tipi di attacchi.

Per visualizzare tute le oprazioni che possiamo svolgere bastera usdare questo comando:

python3 wpseku.py

Bruteforce:

Nulla di più semplice una volta raccolto tutti i dati ed eventuali utenti per un esempio admin:

python3 wpseku.py --url https://www.sitoinquestione.com --brute --user admin --wordlist wl.txt --verbose

========================================================================================
Dichiarazione di non responsabilità:
l'utilizzo di WPseku per testare o sfruttare siti Web senza una precedente coerenza reciproca può essere considerato un'attività illegale. È responsabilità dell'utente finale osservare tutte le leggi locali, statali e federali applicabili. Gli autori non si assumono alcuna responsabilità e non sono responsabili per qualsiasi uso improprio o danno causato da questo programma.
========================================================================================

CSS winner Andres Hunger
CSSRELL Andres Hunger
BESTcss Andres Hunger